Showing posts with label Office. Show all posts

10.03.2012

Then & Now: The Office


Continuing along with our tour through the progress we've made on the house in the first two years, which very well may take until we've lived here for three years to complete, here's a look at our office/guest room. It's a very bright, sunny room with the nice double window that looks out over the front yard. That's one reason why we chose it for the office instead of the nursery, thinking that the room in the back corner would ultimately be better for nap time. And since this room now needs to serve double duty as our office and space for guests, it's nice that it's the bigger of the two other bedrooms in the house. 


As you can see, when we moved in, this room was that lovely pale yellow, just like every. other. room. in the entire house!


Here's what it looked like after we added our new desks last fall, but before we got rid of the yellow. The light wood looked lost against that awful color.


But it pops nicely against the bright, cheery green we chose. 


Here's a reminder of the old hand-me-down tables we were using as desks before we got the new ones. 


And another angle of the Ikea solution that replaced them. 


This is what it looked like before we managed to fill the open shelves up with stuff.


Here's the other window in the room that looks out toward the side yard of the house. We had quite a conglomeration of metal storage shelves, and big clunky and rusty file cabinet, all of which drove me a bit crazy with their mismatched feeling. 


After we installed the first batch of new furniture from Ikea, which included file cabinet and new white shelf under the window, we still used the old metal shelves while we waited to sort out what the closed storage solution on the wall was going to be. You can see from this photo that this room serves a lot of purposes, and really needed some help!


Here's the current solution, with the overhead storage cabinets now containing most of the crafty stuff, and giving us some more open storage above (which admittedly, still needs attention!) We were able to design a solution that fit perfectly around my old couch, which had been living in my mom's basement since I moved in with Greg six years ago. The couch blocks some of the shelves in the corner, but we're using those to mostly store the linens and pillows for guests. The back cushions come off the couch very easily to allow access to those shelves, and to turn the couch into a twin sized bed. In addition to that, the top cushion can fold forward onto the floor creating a queen sized mattress on the floor. It turned out to be a perfect solution for a flexible office guest room. 


And, since I don't have any now shots of the closet wall, here's a reminder of what that looks like. You can see from the first photo that there is some wall space to the right of the closet. You can get the slightest glimpse of a ledge inside the closet, behind that wall. Because our house is a split level, that ledge is actually the ceiling of the coat closet half a level down by the front door. It drives us a little bit crazy that there is a whole bunch of storage space, just waiting to be utilized. We have talked about opening up that wall, above the height of the ledge to create an open shelving solution of some sort, perhaps to house the TV and the printer which now live on metal shelves in front of that space. Who knows when we'll get there though. 

So, to recap...

What did we do?
  • New desks, rolling drawers, file cabinets, wall shelves, wall mounted cabinets
  • Added the couch
  • Painted
What's left?
  • Real window treatments, to replace that paper ones that are still up, and badly needed for privacy. We'll probably go with wood blinds like the ones in the master, but in in white instead. 
  • Bust through the wall next to the closest as described above
  • Paint the trim, and touch up the paint in general
  • Add a modern closet system to maximize storage inside the closet
  • Get rid of the white plastic drawers under my desk (mostly containing my make-up which will move to it's new home in the dressing table in the master)
  • New light fixture
  • Hang art and a magnetic white board
  • Organize the open storage on top of the wall cabinets
  • Split system air conditioner to serve both bedrooms on this level


2.20.2012

Wall Cabinets


We're still working on getting the office all set up and put back together. The latest phase was building and installing these wall cabinets we picked up at our recent trip to Ikea. Since we keep such a wide variety of stuff in the office, and it's not all nice to look at, we really liked the idea of these floating cabinets with doors. They are up on the wall because ultimately we will be putting a couch under them so we will have more space for guests. 


Constructing them went pretty quickly. They were all built the evening we brought them home. The amount of cardboard packaging from 4 cabinets with 5 doors was quite insane!


The installation went pretty smoothly, because as usual, Greg doesn't mess around. This system, the Besta system, which is the same one we used for our storage in the basement, comes with this nice mounting rail. Greg installed all the rails on the wall first. The spacers between them made it really easy to get all the cabinets up on the wall in exactly the right spot.


Here's what they looked like before the doors went on. We wanted to put them high enough on the wall to leave room for the couch, but low enough so that we could still stash more attractive stuff on top. We also used a single unit on the floor which will serve as an end table for the couch. Originally, we had wanted a tall, vertical cabinet to that the storage until would be a continuous L shape. But, we ran into a little problem with the light switch location, which would have fallen in the middle cube of the vertical cabinet. This solution seemed to work our pretty well. 

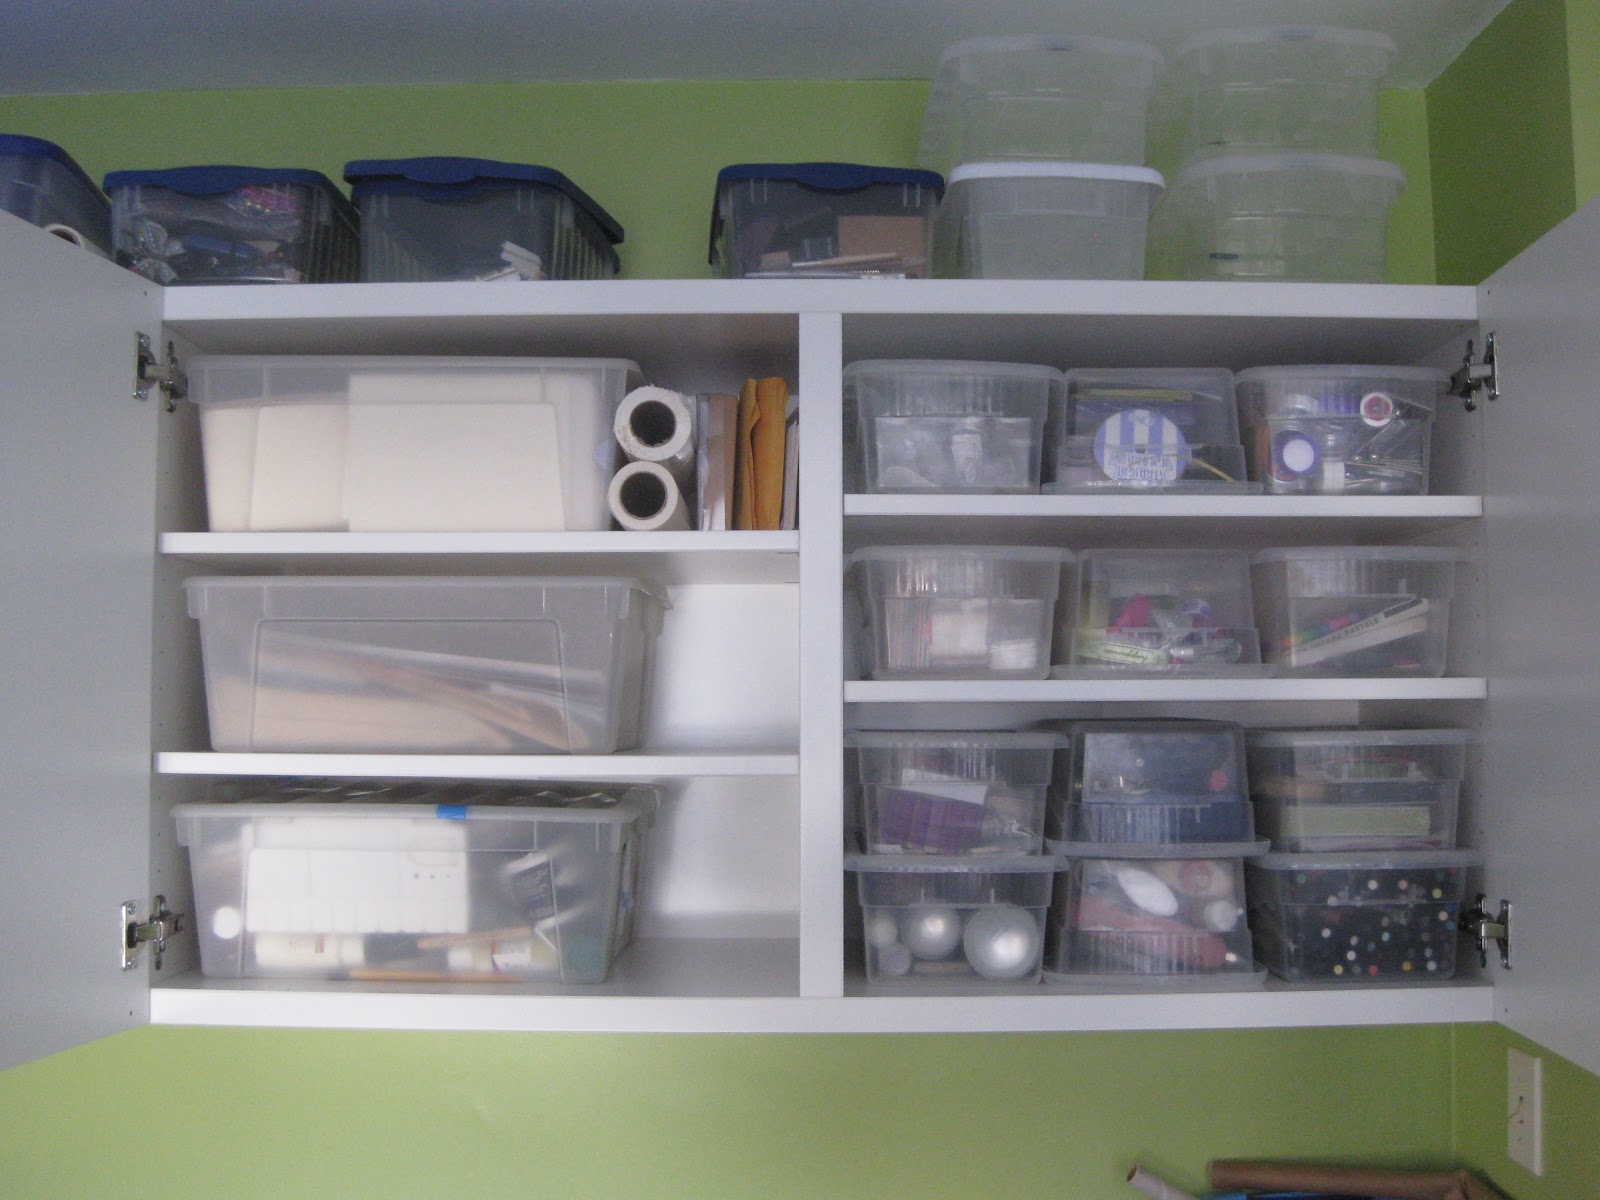
So, yeah, we know, we have a lot of stuff. Here's a peak inside the cabinets at some of it. 


This cabinet holds most of my crafting supplies. 


This one has ironing and other miscellaneous laundry supplies, and other random housewares like heating pads and ace bandages. We also ended up with a shallow height shelf which is working perfectly for my large format printing paper, sketch pads, etc. 


The last cabinet holds a bunch of Greg's random computer parts, CDs, software, etc.


Here's how it's looking now. You can see, we'll be able to fit a lot of that stuff on the top. Even though we have a lot, we are trying to purge...see, there are 4 empty bins up there. Really!

So, the room continues to be a work in progress. I may never get a glamour shot, but it's become a much more pleasant place to be with each step we take. I can't wait to see how the couch looks when we finally get it back from my mom's basement later this spring. 


2.12.2012

The Hallway

I promised a few shots of the finished hallway/landing after our day of painting last weekend. We love it so much, we keep asking ourselves why we didn't just do it when we painted the living room on the first place. 


Above, a view from the landing, looking down to the living room, and up to a glimpse of purple in the master bedroom. 


Another shot looking into the bedroom. 


Now, standing at the door to the bedroom, looking down into the green office. I'm really loving seeing all the colors in the house framed by each other. 


Lastly, there is one spot in the office where you can look out the door, see the teal in the hallway, and a little sliver of the purple in the bedroom beyond. Yup, I'm happy. 


2.06.2012

Green

This weekend, we painted the office. As Greg's friend Eric asked while they chatted on the phone..."Purple, or green?" Well, I guess it's good to be known for something.


Here's a before shot in case you forgot what that awful yellow was like. 


It became even more awful after we bought our new office furniture last October. We decided to go with a mix of white and light wood (birch according to Ikea.) Isn't it amazing how much better both the white and the wood pop off the green?


Of course, before a room looks finished, there must be chaos. We moved a lot into the other bedroom, but pushed the desks and TV shelf into the center. It's always handy to have a raised work surface for painting projects as well.


While we were mobilized for painting, we thought it was a good time to finish off the hallway. When we painted the living room  a year ago, we weren't sure if we wanted to carry the teal blue all the way up the stairs. It didn't take us long to realize that it was the right decision, but we had so many other projects in front of us, it took until now to get back to it. 

Greg had to use our tallest ladder to reach that very farthest corner above the stairs down. Yes, he did climb up and balance himself right over the stairs. I wish I had gotten a picture of that. At least, the way the ladder was wedged in, it was highly unlikely that it would go anywhere. 

And now, a few more after shots, and a little more about the furniture we bought. 


Here you can see one of the two desks we bought. Love back above for the rest of the second. They are basically two variations of the same style. The one above has a cabinet and a drawer. We added a little shelf under the window, mostly so I could stash some stuff on the top of the desk and Ziggy would still have a place to sit by the window. We got two sets of drawers on wheels that we can move around,  stash under the desk, etc. 


I'm so in love with how the white shelves look against the green. Now, I just have to find a way to disguise the largely unattractive stuff that Greg likes o put up there! I also have a plan for hiding our router, modem and back-up drive. I just need to get to it!


The last pieces we got were a filing cabinet and an open shelf to go next it. The filing cabinet still needs drawer pulls. Right now we're using two of my belts to get the drawers open. We still have some more storage to buy for the wall opposite the big window. We might be getting that this weekend! Maybe sometime after that, I will actually get the room all cleaned up and get some nice photos. We shall see. But I think it's all coming together little by little.

Now, I think I will leave you hanging a few more days to see how the hallway turned out!

11.20.2011

Transforming the Office - Part One


About a month ago, my mom came to visit. I specifically requested that she come to stage an "office intervention." Our office had lost all semblance of control. Both desk surfaces were completely covered with junk. There were boxes of stuff on the floor that needed to be files. It was complete chaos, and neither one of us wanted to spend much time in there.

We use the room for a lot. Aside from office tasks, it's also where I keep most of my craft supplies. If you don't have a clean surface to work, then it doesn't inspire much use of said craft supplies. We also have our ironing board in there. I tend to fold most of the laundry in there with the company of the TV. (Yes, I'm a TV person, sue me. We don't have one in the bedroom, so the office gets the laundry sorting, aside from the fact that our cats spend a lot of time on the bed, and the last thing I want to so is dump a pile of clean clothes on top of the hair they leave behind. And since many of my clothes are housed next to the office, it's a good place to start.

Anyway, my mom arrived in the afternoon. Greg was already home, and the two of them came up with a plan which involved going to IKEA. I was a little resistant at first. (Shocker!) I'd had it in my head that we should try to make the office work with what we already had. We had two 5x3 tables that we got for a few bucks from a friend closing a business. They were very worn, white laminate. While they provided good space, they were just dirty, and worn, and almost too deep for the room. It was hard to reach something at the wall side the the table while seated.

I apologize for not having many before pictures of the true state of the mess that had taken over. Here are a few shots from what it looked like the first week we lived here. You at least get a sense for the various furniture items we are working with before they were completely taken over with stuff.


Eventually, I came around to the idea of making a small investment, especially in a new file cabinet. (Oh how I hated that rusty, gray metal cabinet!) My mom offered to pitch in as an early Christmas present as well. How could I say no to that?!

We ended up with two new desks, two new rolling drawer cabinets, three wall shelves, a file cabinet, and an open shelf to go next to the file cabinet. We also wanted to get some wall mounted cabinets, but they were out of stock. Eventually, we plan to add a couch to this room as well. (I told you we do a lot in here), to serve as additional guest space. Currently, the couch is in my mom's basement. It also functions as a twin bed when you take the cushions off the back, or folds open to be a queen on the floor. The wall cabinets will serve as storage above the couch.

It might have been a good thing that the wall cabinets were out of stock. We pretty much filled the truck, and then spent the next several hours assembling furniture. I went work on the file cabinets and rolling drawers in the living room, while Greg broke down the old tables, installed the wall shelves, and assembled the desks in place in the office. By the way, I love how easily the casters on the coffee table allowed me to move it out of the way to create a nice open work area.


We still have a lot to do in the room, like painting. I'm thinking  a green color, similar to, but lighter than the coffee table. And I really don't have a good shot to share yet of the furniture we bought in place (cause I still haven't managed to stage the room yet to get a nice one!) So, you will have to wait patiently for that! But, the room already feels a million times better, as evidenced by the fact that I am actually sitting at my desk while typing this, instead of on the couch in the living room.

Back up at the top, you can see Ziggy enjoying the new hutch shelf in front of the window. Yes, we pretty much bought this as a cat shelf, so they can have a place to look out the window, while we still have space for office supplies. You can also see the birch color of the desks we bought. We're doing a mix of white and birch, which is coming out quite nicely, and will look even better when we obliterate the yellow, which is currently way to close to the color of the birch items.

When I get around to taking more shots, you will see the white and birch mix on the new filing cabinet, which has also created yet another cat perch in front of a window. I'll tell you more about all the great features of what we got then too.

Yeah, so soon, I promise, I will clean up the room and take some nice pictures. Really.

7.29.2010

Tour - Part Two


To continue the tour, (I’ve managed to supplement with some shots Greg took)...there are three bedrooms in the house. Three real bedrooms. With real closets. Not a half of a living room on the main room pretending to be a third bedroom like many of the capes that are so common around here. And the master bedroom is enormous. From the outside of the house, it is quite deceiving, because it is so efficiently tucked in above the living room. Yes, it does have sloped ceilings like many a cape, but it is huge! Room for a king sized bed if we can ever manage to get one. And the best part is the storage. Accessed through one of the master closets, you can get to the attic above the two other bedrooms. In addition to that, there is a space which runs along the entire eaves on the left side of the picture. It will be possible to add a dormer in the future in order to add a master bath and bigger closet. Yet another project for the 5 or more year plan. This house will definitely be our new hobby. 


The other two bedrooms are side by side a half-level up from the living room. The one in the front (above) is a bit larger, and has a nice double window facing the street. The closet is a decent size, and has a portion that stacks above the coat closet in the living room below. You can just see it on the right of the closet opening below. We may consider opening that up to be more accessible storage. 


The smaller bedroom (below) faces the side and back yards. It might be a bit smaller, but it boasts the biggest closet in the house, running the full length of one wall. The last room on this floor, which we have yet to photograph, is a lovely pink full bathroom. I guess we won’t miss the one we are leaving behind!

Next time, we’ll visit the garage, basement, and maybe even the yard. 

Comments transferred from previous Blog:

Wow! More natural light! And you are right... that Master *is* big! YAY!
Friday, July 30, 2010 - 06:50 AM
VICKI
So awesome to have all that space and REAL closets!!!!  You'll be living there soon!!!! I LOVE it!!! It has all the charm and character you always wanted. Can't wait for Paart 3.
OXOXXOXOXOXOXOXOXOO
Friday, July 30, 2010 - 01:53 PM