Showing posts with label Hidden Storage. Show all posts

10.03.2012

Then & Now: The Office


Continuing along with our tour through the progress we've made on the house in the first two years, which very well may take until we've lived here for three years to complete, here's a look at our office/guest room. It's a very bright, sunny room with the nice double window that looks out over the front yard. That's one reason why we chose it for the office instead of the nursery, thinking that the room in the back corner would ultimately be better for nap time. And since this room now needs to serve double duty as our office and space for guests, it's nice that it's the bigger of the two other bedrooms in the house. 


As you can see, when we moved in, this room was that lovely pale yellow, just like every. other. room. in the entire house!


Here's what it looked like after we added our new desks last fall, but before we got rid of the yellow. The light wood looked lost against that awful color.


But it pops nicely against the bright, cheery green we chose. 


Here's a reminder of the old hand-me-down tables we were using as desks before we got the new ones. 


And another angle of the Ikea solution that replaced them. 


This is what it looked like before we managed to fill the open shelves up with stuff.


Here's the other window in the room that looks out toward the side yard of the house. We had quite a conglomeration of metal storage shelves, and big clunky and rusty file cabinet, all of which drove me a bit crazy with their mismatched feeling. 


After we installed the first batch of new furniture from Ikea, which included file cabinet and new white shelf under the window, we still used the old metal shelves while we waited to sort out what the closed storage solution on the wall was going to be. You can see from this photo that this room serves a lot of purposes, and really needed some help!


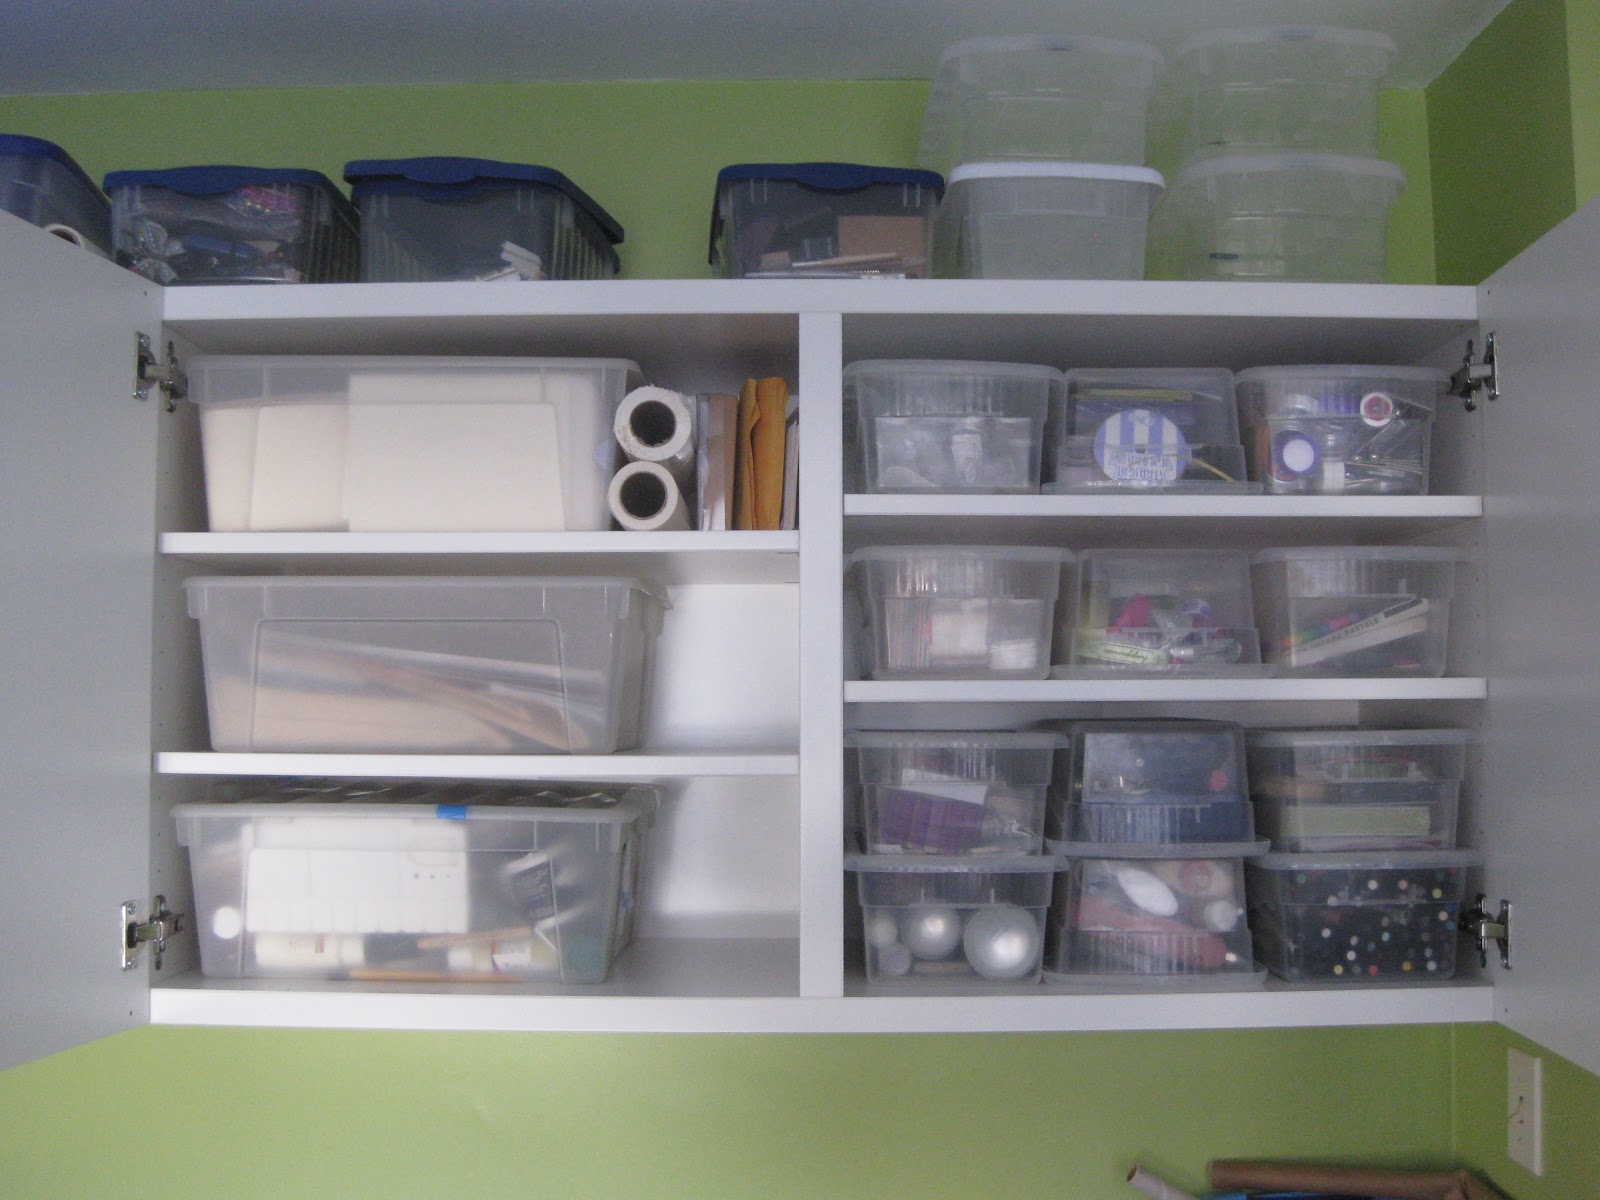
Here's the current solution, with the overhead storage cabinets now containing most of the crafty stuff, and giving us some more open storage above (which admittedly, still needs attention!) We were able to design a solution that fit perfectly around my old couch, which had been living in my mom's basement since I moved in with Greg six years ago. The couch blocks some of the shelves in the corner, but we're using those to mostly store the linens and pillows for guests. The back cushions come off the couch very easily to allow access to those shelves, and to turn the couch into a twin sized bed. In addition to that, the top cushion can fold forward onto the floor creating a queen sized mattress on the floor. It turned out to be a perfect solution for a flexible office guest room. 


And, since I don't have any now shots of the closet wall, here's a reminder of what that looks like. You can see from the first photo that there is some wall space to the right of the closet. You can get the slightest glimpse of a ledge inside the closet, behind that wall. Because our house is a split level, that ledge is actually the ceiling of the coat closet half a level down by the front door. It drives us a little bit crazy that there is a whole bunch of storage space, just waiting to be utilized. We have talked about opening up that wall, above the height of the ledge to create an open shelving solution of some sort, perhaps to house the TV and the printer which now live on metal shelves in front of that space. Who knows when we'll get there though. 

So, to recap...

What did we do?
  • New desks, rolling drawers, file cabinets, wall shelves, wall mounted cabinets
  • Added the couch
  • Painted
What's left?
  • Real window treatments, to replace that paper ones that are still up, and badly needed for privacy. We'll probably go with wood blinds like the ones in the master, but in in white instead. 
  • Bust through the wall next to the closest as described above
  • Paint the trim, and touch up the paint in general
  • Add a modern closet system to maximize storage inside the closet
  • Get rid of the white plastic drawers under my desk (mostly containing my make-up which will move to it's new home in the dressing table in the master)
  • New light fixture
  • Hang art and a magnetic white board
  • Organize the open storage on top of the wall cabinets
  • Split system air conditioner to serve both bedrooms on this level


2.20.2012

Wall Cabinets


We're still working on getting the office all set up and put back together. The latest phase was building and installing these wall cabinets we picked up at our recent trip to Ikea. Since we keep such a wide variety of stuff in the office, and it's not all nice to look at, we really liked the idea of these floating cabinets with doors. They are up on the wall because ultimately we will be putting a couch under them so we will have more space for guests. 


Constructing them went pretty quickly. They were all built the evening we brought them home. The amount of cardboard packaging from 4 cabinets with 5 doors was quite insane!


The installation went pretty smoothly, because as usual, Greg doesn't mess around. This system, the Besta system, which is the same one we used for our storage in the basement, comes with this nice mounting rail. Greg installed all the rails on the wall first. The spacers between them made it really easy to get all the cabinets up on the wall in exactly the right spot.


Here's what they looked like before the doors went on. We wanted to put them high enough on the wall to leave room for the couch, but low enough so that we could still stash more attractive stuff on top. We also used a single unit on the floor which will serve as an end table for the couch. Originally, we had wanted a tall, vertical cabinet to that the storage until would be a continuous L shape. But, we ran into a little problem with the light switch location, which would have fallen in the middle cube of the vertical cabinet. This solution seemed to work our pretty well. 

So, yeah, we know, we have a lot of stuff. Here's a peak inside the cabinets at some of it. 


This cabinet holds most of my crafting supplies. 


This one has ironing and other miscellaneous laundry supplies, and other random housewares like heating pads and ace bandages. We also ended up with a shallow height shelf which is working perfectly for my large format printing paper, sketch pads, etc. 


The last cabinet holds a bunch of Greg's random computer parts, CDs, software, etc.


Here's how it's looking now. You can see, we'll be able to fit a lot of that stuff on the top. Even though we have a lot, we are trying to purge...see, there are 4 empty bins up there. Really!

So, the room continues to be a work in progress. I may never get a glamour shot, but it's become a much more pleasant place to be with each step we take. I can't wait to see how the couch looks when we finally get it back from my mom's basement later this spring. 


10.04.2011

Fire and Entertainment


Sometime toward the end of the summer, Greg installed the final pieces of out entertainment wall, the component rack and shelves to the right of the fireplace. It's taken me awhile to fill up the shelves. As you can see from my last post, my little collection of Halloween items has helped to fill some voids. After that, the Christmas stuff will take over. So, I guess I don't have to worry too much about styling the shelves for awhile. And, it should be an evolution anyway, right? I do need to take some time to update and fill up some of the picture frames though! That large purple one was a recent TJ Max find for $7.99. I think it's perfect for this room. 

You can also see that Greg got his speakers up on the wall next to the TV. We're still working on the cable management. We have some ideas. Just need the time to implement. He has the surround sound speakers on the wall now too, but hasn't had a chance to wire them.


We loved this wall mounted component from IKEA because it allowed us to get up over the baseboard heat, and it left room for Greg's new sub woofer (which I have additional plans to hide even better in a different corner of the living room). Greg did a little hack job to add some drawer glides to make it easier to access the back of the receiver. 


Another project that is in the works here, is figuring out a way to screen the glass in the left most shelf. Our old coffee table had a lot of storage. The new one has none. Now, all the unattractive stuff is behind the glass door and I don't want to see it. I am experimenting with different contact paper stripes, etc. to create a frosted look. More on that when I finalize the plan.


This Sunday, we also had our very first fire in the our fireplace, which was made possible by our conversion from oil to gas heat. I have yet to write about that process! And yes, it's Sunday, so Greg was watching football. 

Now, we need to work on getting a screen that isn't brass!